Monday, March 14, 2011

How many ways can one use a zucchini?

The humble zucchini, what can be said about it?  There are just so many uses for it as I have had to learn as my husband has shown me his green thumb skills since moving out to the suburbs.  We weren't even here two weeks and we had a huge veggie patch dug out and planted.  The result in mere weeks - due in part to the ridiculous amount of summer rain we got here in Melbourne was this.  
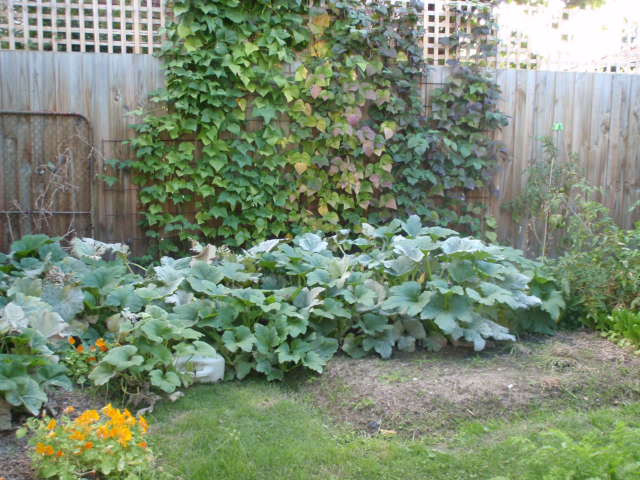
Our Veggie Patch - look at all those beans and Zucchini plants!

And now we have zucchinis coming out everywhere.  He does now concede that 16 zucchini plants is a bit much considering we are a family of 4, 2 under 4 years old, you can only eat zucchini so many days in a row and well zucchini can't really be kept for any great periods of time.  So the end result is that we have dropped off zucchini to our neighbours and I have done a lot of dinners with zucchini and now am baking with it.  

Best use of a zucchini on the sly...grating.  I grate it into everything possible when I cook.  It gets chopped into sauces, mixed in stir fries, put in tacos and grilled very often.  I hide it in burgers and meatballs.  Recipe for tasty chicken meatballs is included below.  

Chicken Balls with grated Zucchini

My first baking adventure was Zucchini Bread.  It is great.  Has chocolate melted through the batter and has chocolate chips.  Kids think it is cake.  I also made it into muffins as an easy snack.  I thought with the 3 loaves and dozen muffins I could put some in the freezer, but it was not to be.  Just too tasty to save for later.  This recipe is below as well.

Chocolate Zucchini Loaf

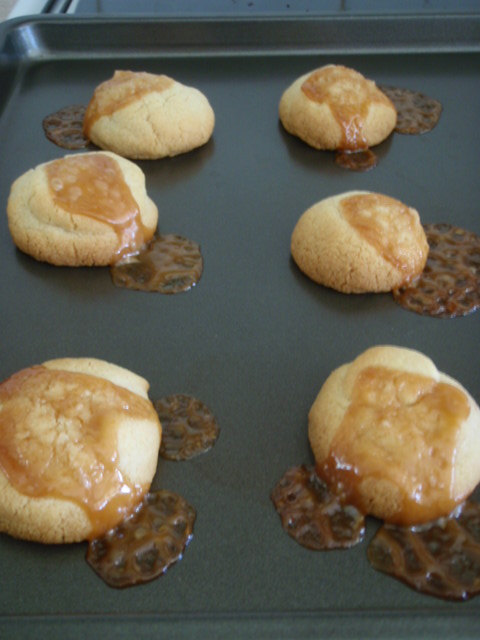
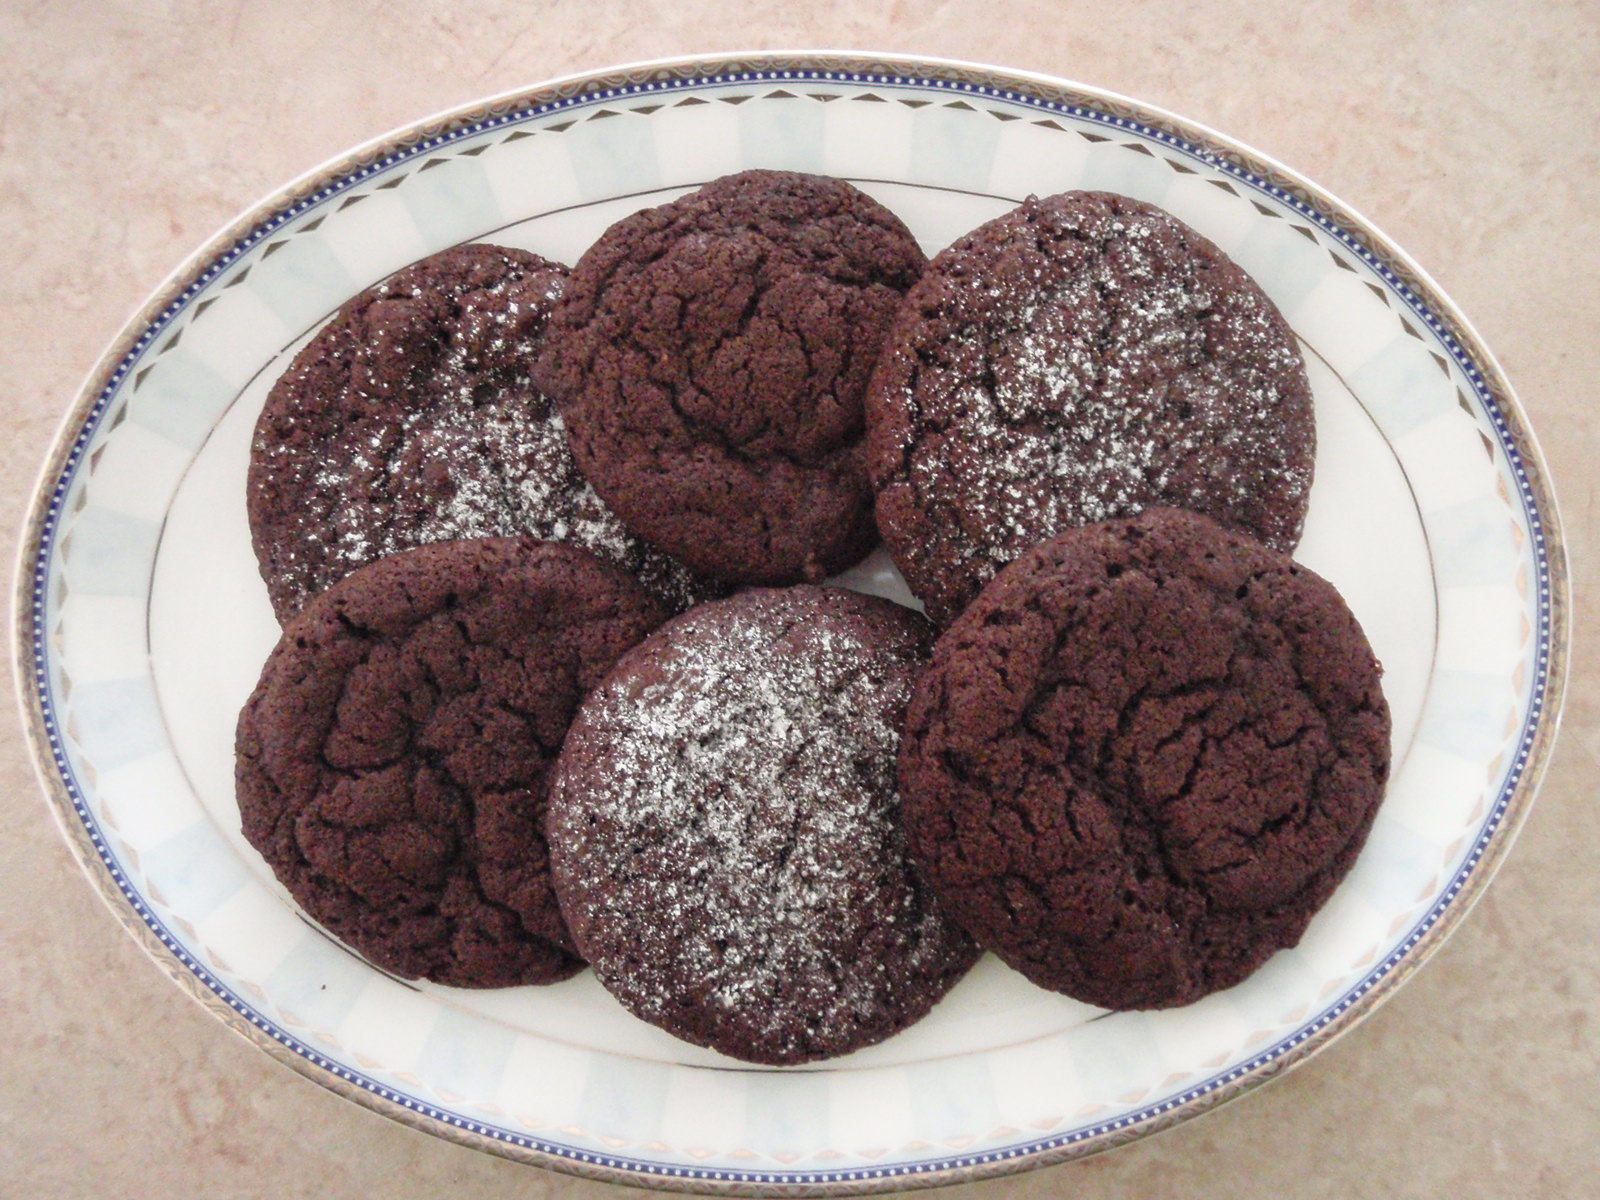
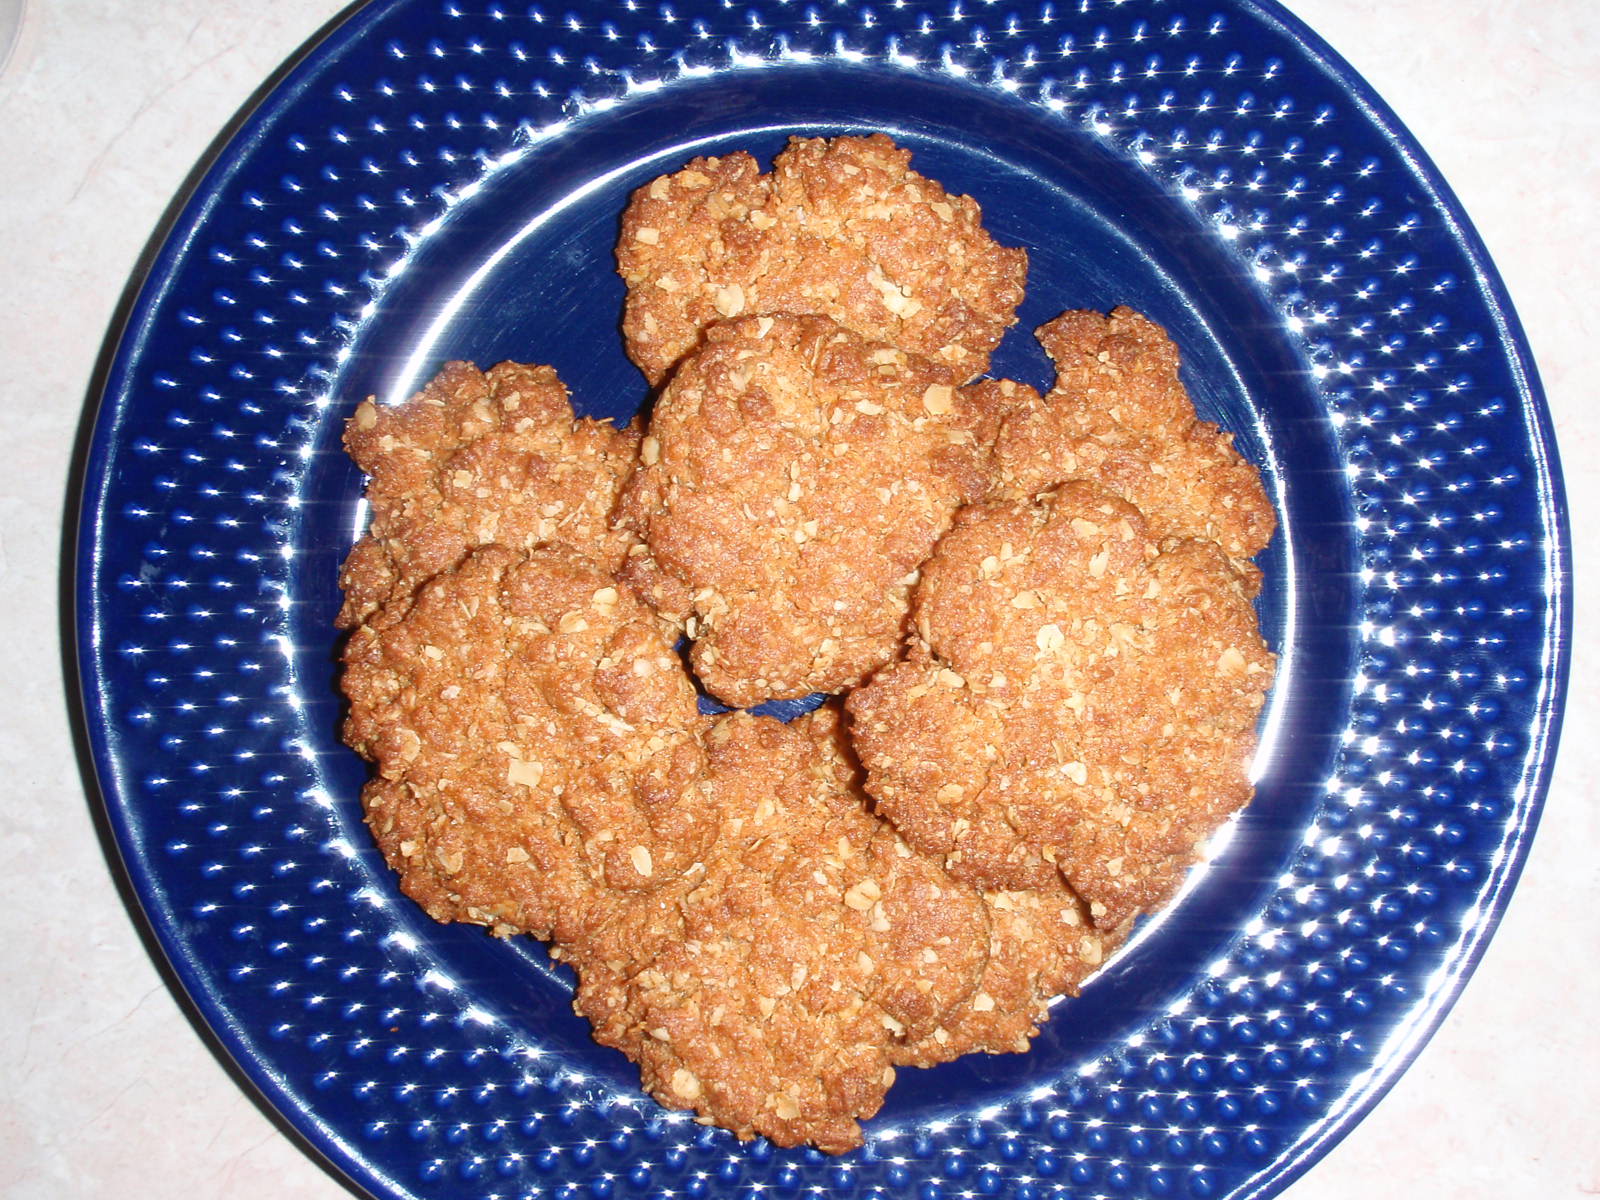
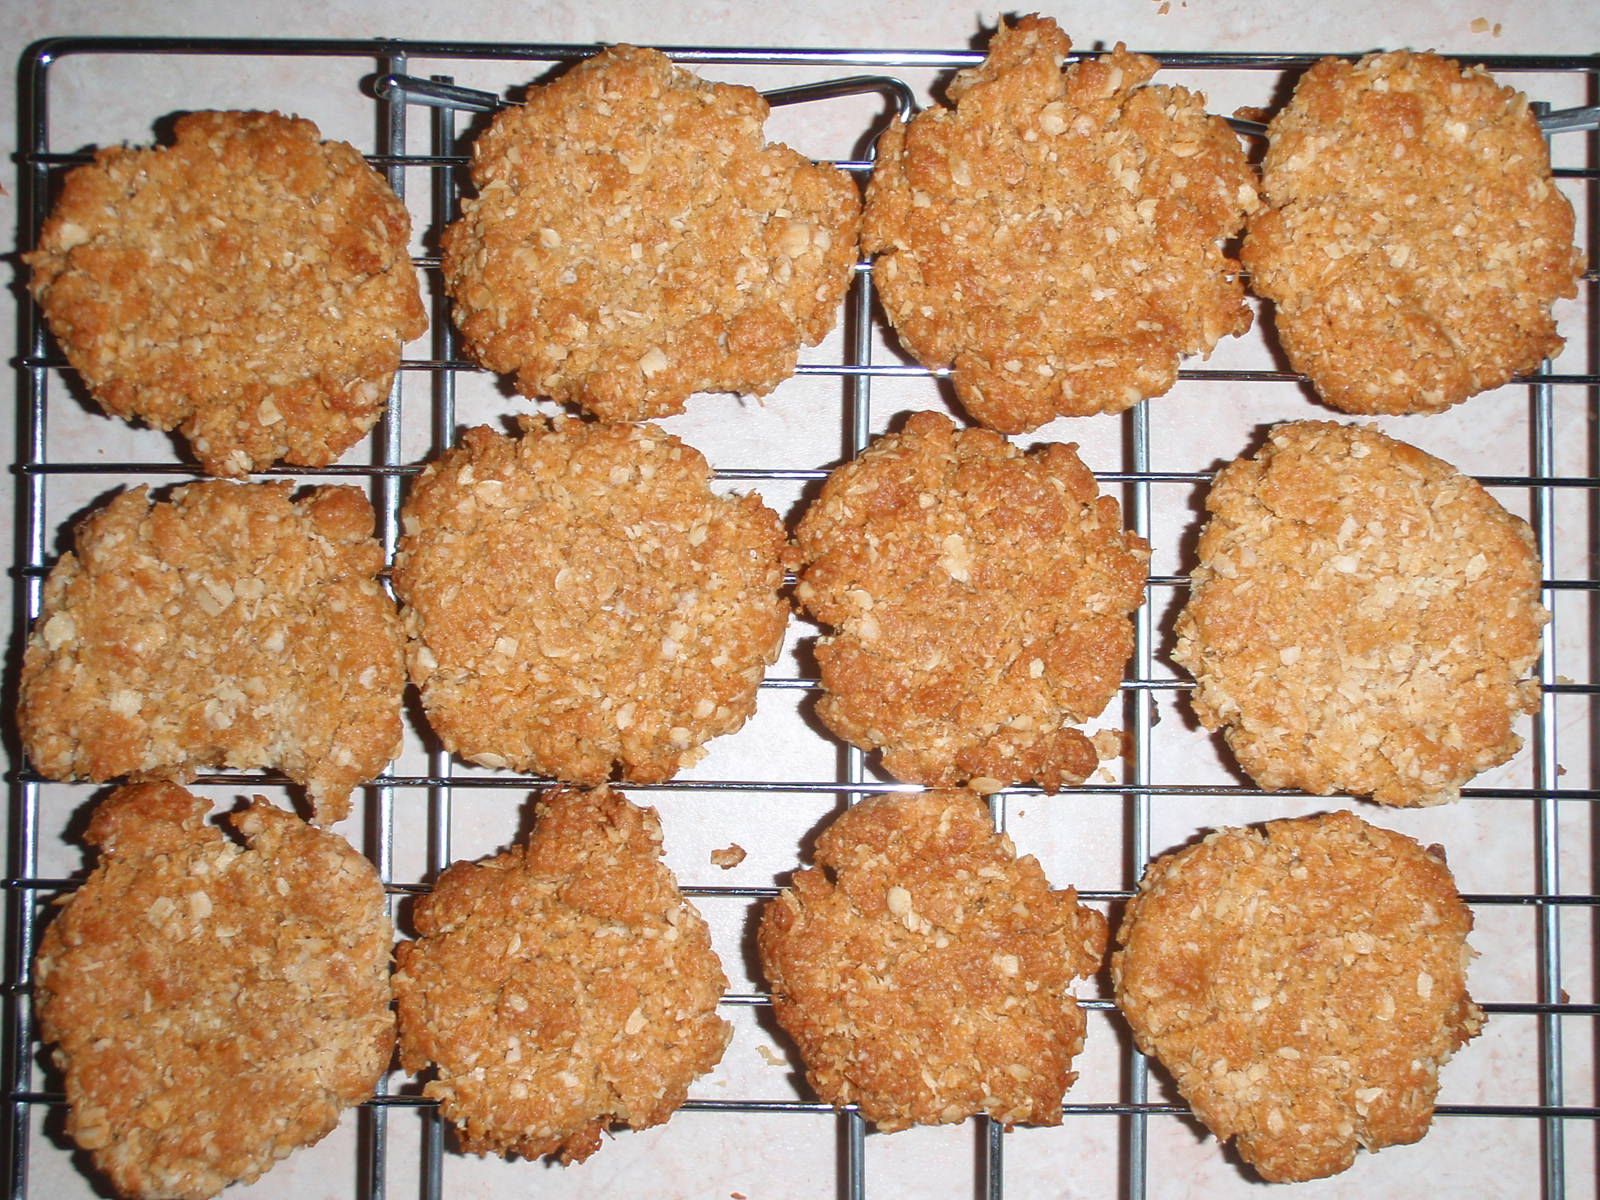
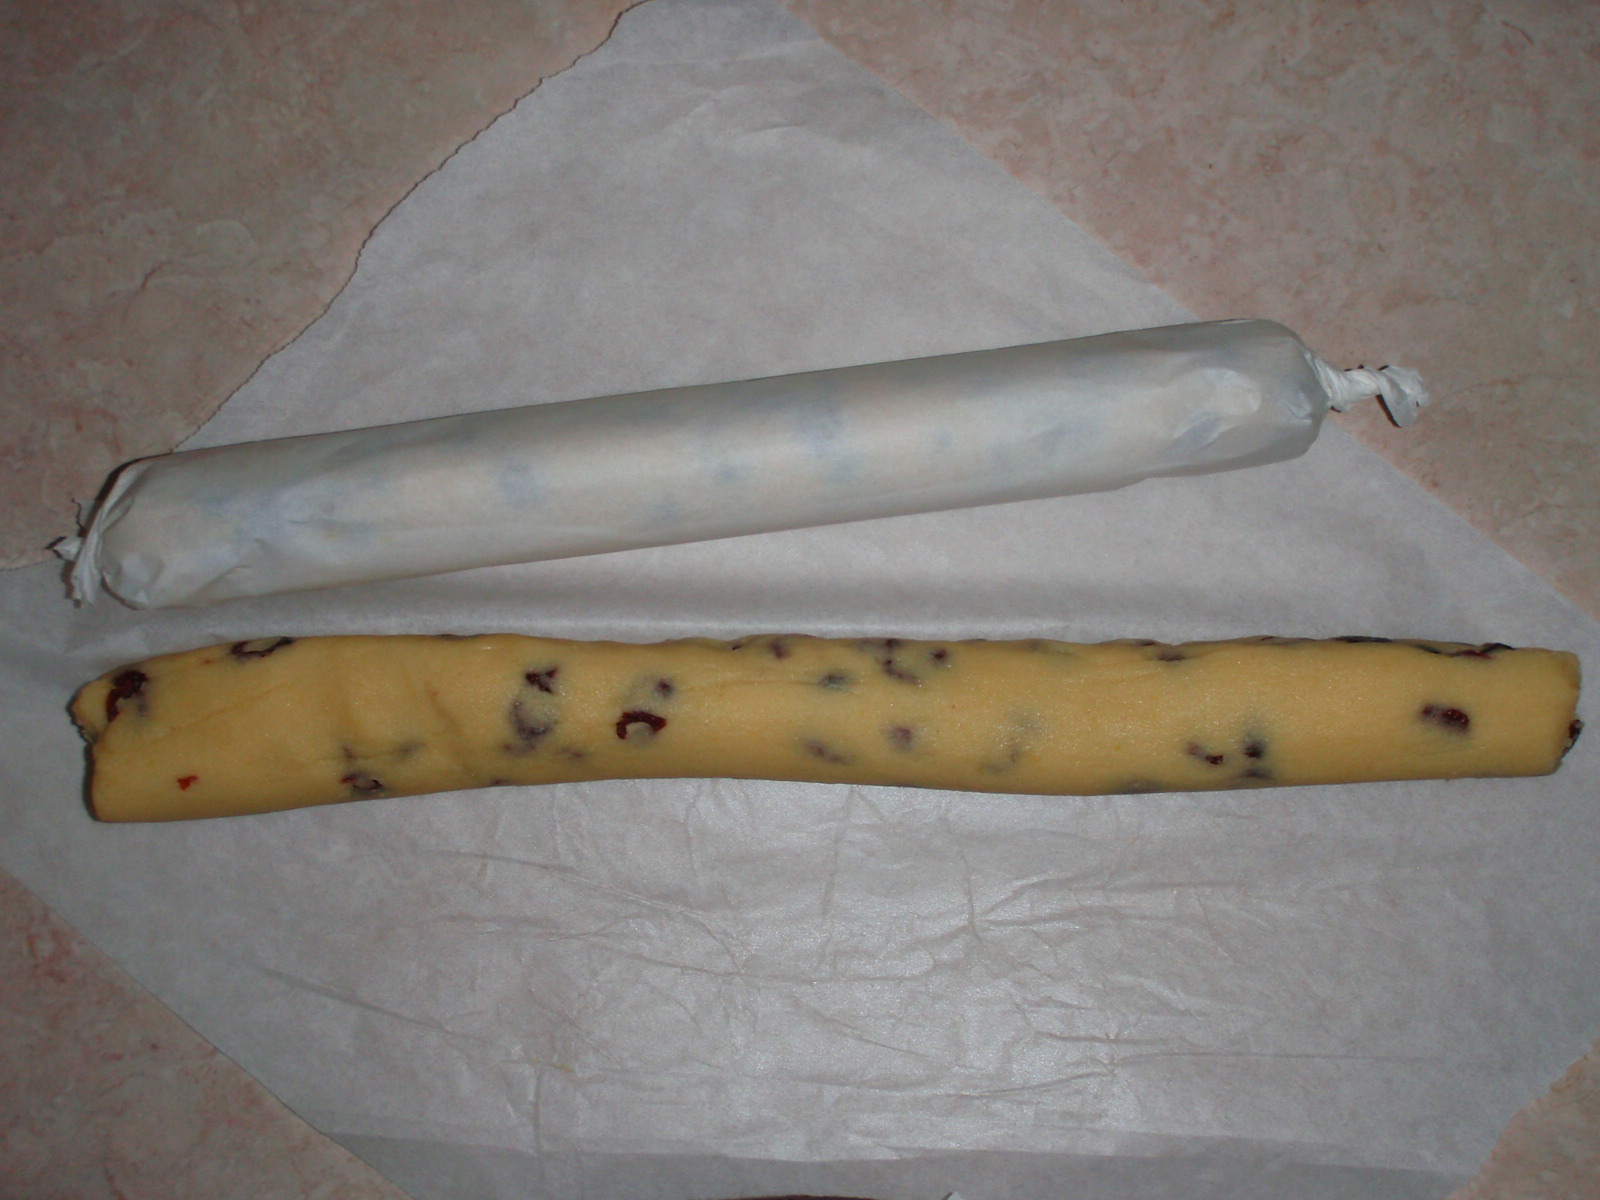
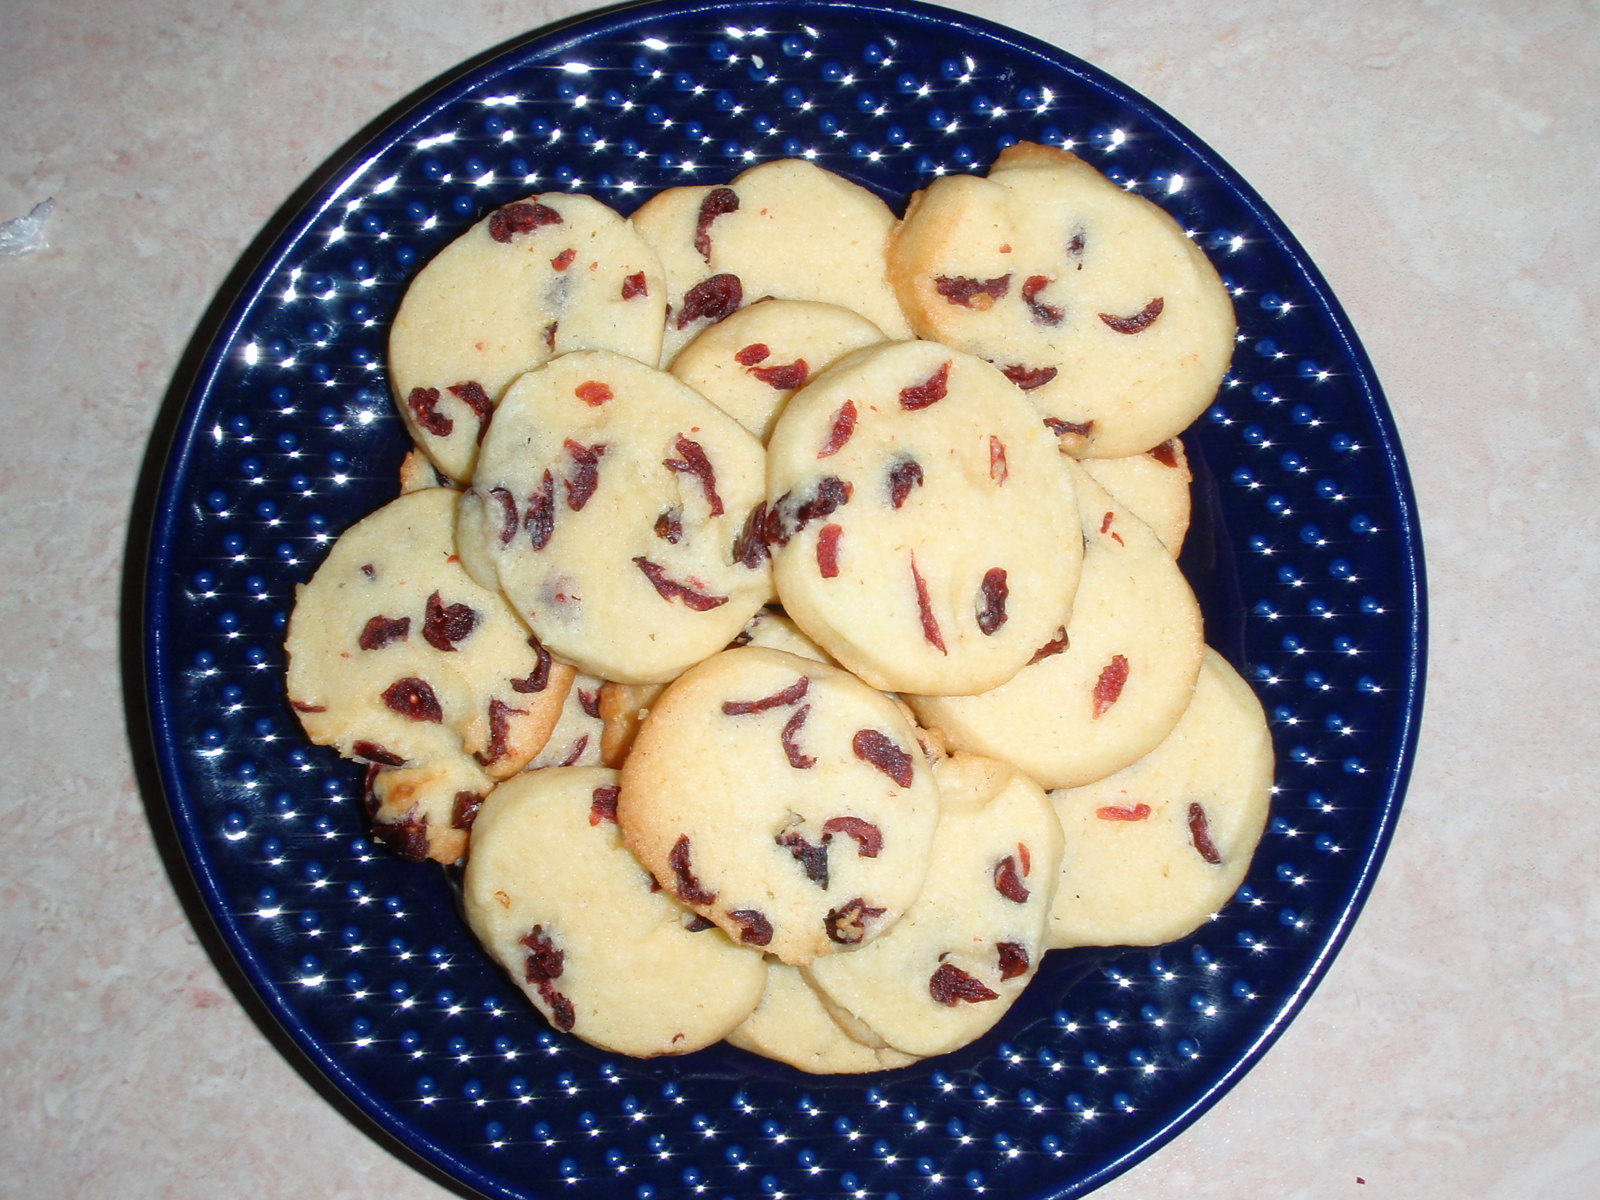
But now for the best one of all.  Zucchini cookies!  These look like chocolate chip cookies and have the essential ingredients of a chocolate chip cookie, but they are a little bit more on the cakey cookie side - almost like a muffin top.  They are divine.  They taste great, they look great and once again other than a little green mixed through (I used white zucchini though) you wouldn't know there was zucchini in it.  This one I made a double batch (got rid of a monster sized zucchini I had in the fridge) and have a huge amount for my freezer.  Great for after Kinder snacks.

Zucchini Cookies with Chocolate chips!

Hope you enjoy all three of today's recipes!

Zucchini Cookies
  • 3/4 cup  175ml butter
  • 1 1/2 cup 375ml sugar 
  • 1 egg beaten
  • 1 tsp vanilla
  • 1 1/2 cups grated zucchini
  • 2 1/2 cups flour
  • 2 tsp baking powder
  • 1/2 tsp salt
  • 1 tsp cinnamon
  • 1 cup almonds or other nuts - I substituted and put in oats as we're allergic to nuts
  • 1 cup chocolate chips

Cream butter and sugar.  Add egg, vanilla then zucchini.  Add dry ingredients, spices and nuts and stir in chocolate chips.  Drop by the teaspoonful on a greased cookie sheet.  Bake at 350 F/ 180 C for 12 - 15 minutes. 

Chocolate Zucchini Loaf
  • 56 g unsweetened chocolate
  • 3 eggs
  • 400 g white sugar
  • 235 ml vegetable oil
  • 250 g grated zucchini
  • 5 ml vanilla extract
  • 250 g all-purpose flour
  • 5 g baking soda
  • 6 g salt
  • 2 g ground cinnamon
  • 125 g semisweet chocolate chips
  1. Preheat oven to 350 degrees F (175 degrees C). Lightly grease two 9x5 inch loaf pans. In a microwave-safe bowl, microwave chocolate until melted. Stir occasionally until chocolate is smooth.
  2. In a large bowl, combine eggs, sugar, oil, grated zucchini, vanilla and chocolate; beat well. Stir in the flour baking soda, salt and cinnamon. Fold in the chocolate chips. Pour batter into prepared loaf pans.
  3. Bake in preheated oven for 60 to 70 minutes, or until a toothpick inserted into the center of a loaf comes out clean.
Chicken Balls with grated Zucchini

500g chicken mince
1 grated zucchini
1 egg
1 small red onion finely chopped
1/2 cup bread crumbs
2 tbsp coriander/cilantro
1 tsp cumin
1/2 cup grated cheese

Combine all ingredients and roll into golf ball sized balls.  Roll the balls in a small amount of bread crumbs.  Place on non-stick baking tray.  Cook for 30-45 minutes (depends on size of balls) on 180 C or 350 F.  Serving suggestion - dip in sweet chili sauce.  Yum!  And my kids gobble these up!

Thursday, February 24, 2011

The smell of Cinnamon.

I often find it hard to settle on just one cookie I want to make each week so now I decide on a search parameter before I start the research.  This week it was the need to use eggs in the cookies, as our chickens are producing faster than we can eat them at the moment, that inspired the choice of recipe. And cinnamon, I thought the house could use smelling like cinnamon today.  So off to the books I went.  If there were no eggs, I passed it by, no cinnamon, I passed it by and if I didn't have the ingredients at hand, I passed it by.  The grand result sounded so yummy and ticked all the right boxes.  Cinnamon and caramel cookies.  No fancy title just stating the obvious.  These little darlings sounded pretty yummy and the picture was screaming out for me to taste them! 

I followed the recipe to the tee and this was the result:
Hmm..this doesn't look like the picture?
 I didn't follow my instinct when reading the recipe as it did state to place the caramel on TOP of the cookie halfway through baking.  I should have done what I thought and pressed the caramel in just slightly.  So ended up with cookies with some running caramel blobs on top and a very messy baking tray.  I know should have also used baking paper, but I love this baking tray and never do.  Hint: if you do have caramel spillage, remove the cookies but not the caramel and just place pan in very hot water and the caramel will dissolve off. 

Next batch turned out like this!  Now these look pretty fantastic!
Yummy!

These little cookies were great!  My husband said how could they possibly not be a hit when they have cinnamon and caramel.  My son was disappointed, but I did make cookies with Smarties in them last week and my daughter just destroyed the cookie to get to the caramel - smart girl.  I wasn't as fond of them as I would have expected.  They were lovely, but I wanted more from them.  Next time I would put just a hint more cinnamon in them and think that would get them to near perfect.  I shouldn't complain, there are only 8 remaining after a half dozen drop off to our neighbour for a taste so that is always a sign of a successful baking experience in our house!

Tips for this one: make sure to push that caramel into the cookie when told to do so instead of placing on top, add a little extra cinnamon to the batter and if using jersey caramels remove the white icing portion in the centre and just use half per each cookie!

Cinnamon and Caramel Cookies

225g/8oz butter, softened
140g/5oz caster sugar
1 egg yolk, lightly beaten
1 tsp vanilla extract
280g/10oz plain flour
1 tsp ground cinnamon
1/2 tsp allspice
pinch of salt
25-30 caramels

Preheat the oven to 190C/375F/Gas Mark 5.  Line 2 large baking sheets with baking paper.  Place the butter and sugar in a large bowl and beat together until light and fluffy, then beat in the egg yolk and vanilla extract.  Sift together the flour, cinnamon, allspice and salt into the mixture and stir until thoroughly combined. 

Scoop up tablespoons of the mixture, shape into balls and place onto baking sheets, spaced well apart.  Bake in the preheated oven for 8 minutes.  Place a caramel on top of each cookie (push into dough)  and bake for a further 6-7 minutes.  Leave to cool on the baking sheets for 5-10 minutes, then transfer to wire racks to cool completely.

Thursday, February 17, 2011

Perfect Party Food!

Today marks two significant occasions.  I have now been in Australia for 3 years and feel quite settled in.  The biggest news though is that my little Daisy Pad - breast pad business has launched it's own website. LimeDaisy Design is officially open for business!  So today's cookie celebrates the two occasions in one!

Party Cookies - they just shout, I'm going to be special.  They are indeed very yummy, kids want to eat them as they have those lovely sugar coated chocolate candies baked in them (Smarties in my case) and the flavour is fantastic.  You can taste the golden sugar/brown sugar combination that gives them a lovely rich sugary taste.  What is even better is they have no egg in them so will be able to take them to kinder for special treat days (as we are nut and egg free!).  Give these ones a go to mark an occasion they are so quick and easy!

Party Cookies
100 g (3 1/2 oz) Butter
100 g ( 3 1/2 oz) soft light brown sugar
1 tbsp golden syrup
150g (5 1/2 oz) self raising flour
85g (3 oz) sugar-coated chocolates

Preheat the oven to 180C/350F.  Line several large baking sheets with baking paper.  place the butter and sugar in a large bowl and whisk together until pale and creamy, then whisk the golden syrup into the mixture until smooth.  Add 1/2 of the flour and whisk together until mixed.  Stir in the sugar coated chocolates and remaining flour then, with your hands, knead the mixture until smooth.
Roll small pieces of the dough between your hands into smooth balls to make 15 cookies in total and place them on the baking sheets, spacing them well apart.  Bake in the preheated oven for 10-15 minutes, or until golden brown.
Leave on the baking sheets for 2-3 minutes, then transfer the cookies to a wire rack and leave to cool completely.

Notes: I placed an extra smartie on the top of each ball before going into the oven so there would be a least one colourful spot showing.  You could use chocolate buttons in the place of smarties if you did not want the harder candy coating.

Enjoy!

Sunday, February 13, 2011

A Little Love (of Chocolate) this Valentine's Day

Valentine's Day is fast approaching.  I'm not one for making it into a big celebration.  A simple card, some sweet treats and telling those you love that you love them is what is important.  So for this Valentine's Day try these two takes on one recipe.  Chocolate Brownies are a favourite in this household.  Getting them right does sometimes come with practice as you really want that fudgey texture with a crisp top.  With this recipe you can achieve that too. 


Chocolate Brownie Heart Cake
 For the first have of the batter I made it into a Heart Shaped Brownie.  Finished it off with a dusting of icing sugar and some love hearts sprinkled on top.  Baked for around 25 minutes - times do depend on your pan shape as well.  This one also served as my birthday cake this year.  Turned out great, but did have little extra crunchy edges at the point and on the rounded top.  Still tasted and looked fantastic.  Very Valentine's!

Mini Brownie Cupcakes
These were for the kids.  Perfect sized for a 3 and 1 year old to have two and think they are getting more!  Baking of these can be a little tricky as you really need to watch that you don't over bake them.  They only need around 12-15 minutes.  But watch them carefully! Finished the same way, dusted with icing sugar and sprinkled with some love.

Wishing you and yours a Happy Valentine's Day!

Chocolate Brownies

150g Butter
1 cup baking cocoa
4 eggs
2 cups sugar
1 tsp vanilla essence
3/4 cup plain flour
1 tsp baking powder

optional extras:
packet of white choc bits or cup of nuts

  • Preheat oven to 160C.  Line base of a 27cm x 18cm x 3cm tin with baking paper.
  • Melt butter and stir in cocoa, allow to cool slightly.  Beat in eggs.  Stir in sugar and vanilla.
  • Sift flour and baking powder together.  Add to mixture and stir until thoroughly mixed.  Stir through choc bits or nuts if being added.  Turn mixture into tin.
  • Bake in a preheated oven for 45-50minutes or until just firm when pressed in the centre.  Leave in tin for 20 minutes then turn out onto a rack.  When cold, cut into bars.

Hints:
  • If using different shape pans, baking times will vary so be sure to keep an eye on brownies
  • An option is to bake in the full size pan, then use cookie cutters once cool to cut into desired shapes such as a heart cookie cutter.
  • Can drizzle melted chocolate over or dust with icing sugar to fancy it up!

Thursday, February 3, 2011

Midnight Snack?

For the last week I seem to have gotten into a terrible habit of staying up way past my usual bedtime.  I am forever cutting circles for my Daisy Pads and have been trolling the Internet looking for design inspiration for my online store.  It is during these wee hours of the night I find I need a little snack and a cup of tea.  I could go for the healthy option, but it usually is something sweet that I crave.  And now I have come across what is just the perfect temptation for the recipe of the week Midnight Cookies.  They are fast to make (under 10 mins of preparation) and they have all the elements that I love.  Little crunch, softer middles and chocolate.  Yes, my friends chocolate.  Any good creative mind knows that we all work better when there is tea and chocolate involved.  I would say wine, but as I sew, wine does not seem to mix well with sharp scissors and needles. 
Midnight Cookies
These are tasty little morsels and so quick and easy to make.  I fancied mine up a little with a dusting of icing sugar and put them on my good china!  Does make them just that little bit more special.  I would give these a most definite thumbs up!  They are chocolatey without being too sweet.  I've even added a few options for you to try out as well to make them your own. 

Enjoy!

Midnight Cookies
125 g/ 4 1/2 oz butter softened
175g/ 6 oz caster sugar
1 egg, lightly beaten
1/2 tsp vanilla extract
125g / 4 1/2 oz plain flour
35g / 1 1/4 oz cocoa powder
1/2 tsp bicarbonate of soda

Preheat oven to 180C/350F.  Line several large baking sheets with baking paper.  
Place the butter and sugar in a large bowl and beat together until light and fluffy.  Add the egg and vanilla extra and mix until smooth.  Sift in the flour, cocoa and bicarbonate of soda and beat until well mixed.
With dampened hands, roll walnut-sized pieces of the dough into smooth balls.  Place on the baking sheets, spaced well apart.  
Baked in the preheated oven for 10-12 minutes, or until set.  Leave to cool on the baking sheet for 5 minutes, then transfer the cookies to wire racks to cool completely before serving.

Additional options:
1) Drizzle melted chocolate in a zigzag fashion across the cookies and leave to set before serving
2) Sprinkle granulated sugar on a large plate and roll the ball of dough in the sugar to coat before placing on the baking sheets
3) After baking and cooled, dust with pure icing sugar. 

Wednesday, January 26, 2011

Happy Australia Day


Happy Australia Day!

Today, my first cookie near fail...and with a biscuit that I was so looking forward to making for the very first time.  I should not have been baking today.  I have a 1 year old who has not wanted to have a nap, tried for an hour this morning and she got the best of me.  So off to the grocery store for some Golden Syrup - of course, she fell asleep in the car on the way and stayed sleeping on my shoulder for the entire jaunt around the store.  She so nicely woke up going back into her car seat so I drove around and around hoping that she would nod off again as I know 15 minutes of cat-napping is not going to keep her a happy little girl today.  No luck, she just chatted and said "Hello" to every tree, stop light, and any other thing she could locate.  My husband even took her for a trip to Bunnings so she would have another chance in the car, no luck and they were back before I got down to baking. 

That leads me to my near failure with ANZAC biscuits.  I chose ANZACs as I have never baked them, but love them!  I am Canadian born and as such did not grow up on them and I seem to forget how much I love them until I start seeing the commemorative tins in the stores that I think "oh, I need to get some ANZAC".  So here on Australia day I decided to bake a day early and get some in the oven.  The making of the dough is easy and fast, although not really a good small child recipe as you need to melt butter and syrup on the stove which is extremely hot.  The smell of the dough once you add the liquid amber with the oats and coconut is divine.  They are a slow baking cookie with needing 20 minutes ( I personally wouldn't go this long as they are just a little bit too hard for little kids) in the oven on a low temperature which gives them a wonderful golden brown colour and a crispy texture.  Perfect with a cup of tea or glass of milk.  Today though instead of the nice slow bake, there started to be a burning odour in the air and I could smell a hot oven.  Hmm...strange it had only been 6 minutes of the baking time - best check.  Ah yes, Little Miss M had jacked the oven temperature up to a whopping 210 C!  Little bit of smoke coming out near the grill and the cookies were a toasty brown with very gooey middles and a hint of smoke flavouring.  My quick fix solution.  Turn the oven off, leave the cookies in for a few more minutes and somehow they turned out OK, not great, but definitely edible. 


The Failed, but yet still tasty 1st Tray


Second tray still not that successful.  Have I met my cookie match?  They taste OK, but I really wouldn't serve them to anyone outside the household. Third tray in the oven, I was not going to be beat by a cookie that so many make and always say what a simple cookie it is.  Do you need to be Australian?  Does the cookie know this?  Is it because I have kept calling it a cookie instead of a biscuit? 

After discussion with my husband, he gave me some constructive criticism on how to improve or what they should really be like.  So here is the final I think successful result. 


Third time's the charm
My Helpful hints for this tasty little cookie:
1) watch them...the time is really long at 20minutes, but can be fine if your oven doesn't register too hot
2) do not let toddlers change your temperature setting
3) let an Australian tell you how they should really taste as they are the experts

Enjoy!

ANZAC Biscuits

Ingredients:

  • 2 cups of rolled oats
  • 2 cups flour
  • 2 cups coconut
  • 1 1/2 cups sugar
  • 250g butter
  • 4 tblspns golden syrup
  • 1 tspn baking soda
  • 2 tblspn boiling water

Method:

Turn oven to 160'C. Lightly grease oven trays.
Put oats, flour, coconut, sugar in big mixing bowl. Melt butter and golden syrup in pan. Take off heat.
Mix baking soda and boiling water in a cup. Add to melted butter in the pan. Quickly add to big mixing bowl. Mix well.
Roll tablespoonful lots into balls. put on trays 5cm apart. Press lightly with fork.
Bake for 20 minutes, one tray at a time.

Thursday, January 20, 2011

Summertime looks to be here...

Summertime...I think it may have finally arrived here in Melbourne. 
How nice is it to be able to sit outside, the kids eating Freezies, playing with Bubbles and in the sandbox while Mum has a nice cold drink.  It is just sparkling water with a wedge of lemon but maybe after 5pm when Dad is home it will have a little something extra in it.  So now that brings me to the recipe of the week inspired by Summer Days and lemons.

Lemon Cranberry Wafers - Refrigerator Cookies

These sounded like they would be yummy little morsels to bake on a hot day.  The dough is made ahead of time and chilled in the fridge for no less than 2 hours and can be kept in the fridge for up to 3 days or in the freezer ( no specific time given but I wouldn't leave it for more than a few months.)  They took me a whopping 8 minutes to make and get in the fridge, so fast and easy too.  The recipe called for Pecans, but as all my recipes will be nut-free to accommodate my allergy I chose to substitute with dried cranberries.  They are chock full of of vitamin c and will look oh so lovely in the cookie.  I worked in a Credit Union in Canada  and the cafeteria served lovely fresh baked muffins each day.  My favourite of all time was the lemon cranberry one so I know this combination will be fantastic.  And with the leftover lemon you too can enjoy the above pictured beverage of your choice. 


After the mixing - here is the dough wrapped and about to be wrapped before getting chilled.  If freezing I would also include a layer of foil or pop in a freezer bag.  Chill for minimum of 2 hours.

The Finished Result
These are wonderful little cookies.  A nice lemony taste, soft texture (you could bake them a bit longer if you wanted them firmer) and the cranberries just add a nice extra flavour to them.  I would recommend these for a picnics, lunchboxes and with a great cup of Earl Grey Tea.  There aren't really any cons to these cookies other than having to wait to bake them, but then the pro is that you can make ahead and pop them in the oven when guests arrive and they will be ready and warm in 12 minutes!  You can't beat that!  There are so many other variations of fridge cookies too and I'll add some variations to my other pages for you to look through over the coming week.

Hope you enjoy! 

Aileen

P.S. Did you like Snickerdoodles or Chocodoodles best?  Leave me a comment below.

Lemon Cranberry Wafers - Refrigerator Cookies

1/2 cup (125gm) butter or margarine, softened
1 cup sugar
1 egg
1 tablespoon each grated lemon peel and lemon juice
2 cups all purpose flour
1/8 teaspoon salt
1 teaspoon baking powder
1 cup dried cranberries


In large bowl of an electric mixer, beat butter and sugar until creamy; beat in egg, lemon peel, and lemon juice.  In another bowl, stir together flour, salt, and baking powder; gradually add to butter mixture, blending thoroughly.  Stir in cranberries, mixing with your hands if necessary to distribute cranberries evenly.  Shape dough into 2 rolls, each 1 1/2 inches in diameter; wrap in wax paper and refrigerate until firm (at least 2 hours) or for up to 3 days.


Unwrap dough.  Using a sharp knife, cut into 1/8 inch thick slices; place slices about 1 inch apart on greased baking sheets.  Bake in a 350 F oven for 12 minutes or until edges are lightly browned.  Transfer to racks and let cool.  Store airtight.  Makes about 6 dozen.